
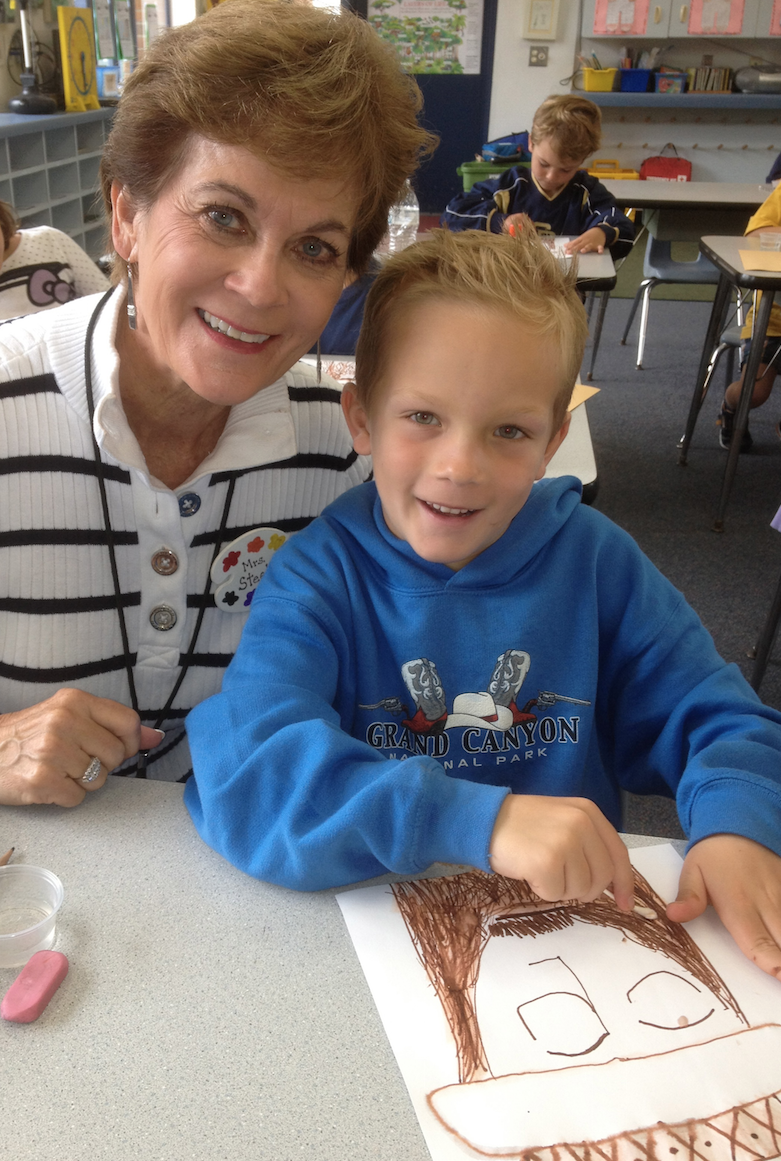
You don’t need an art degree to give kids a great art education. Meet the Masters is built so that a classroom teacher or a parent volunteer can walk into a room, introduce children to a master artist, and guide them to a finished piece of art they’re proud of.
Many elementary schools have no art specialist. That gap is usually filled by the people already closest to the kids: their teachers and their families. This post shows how those everyday educators teach Meet the Masters, walks through the Leonardo da Vinci lesson as an example, and explains why art in the elementary years matters so much.
Who teaches Meet the Masters?
Anyone who cares about kids and is willing to follow a plan. Meet the Masters is designed for two groups:
- Elementary classroom teachers. No art specialist on staff? The classroom teacher can lead every step, using the same scripted lessons and visuals.
- Parent and community volunteers. Many schools run Meet the Masters through parent volunteers. Training videos build confidence before the first lesson.
As the program puts it, “You do not need to be a professional artist” to teach these lessons. What you need is the willingness to follow a script, hand out supplies, and cheer kids on.
Inside the Leonardo da Vinci lesson
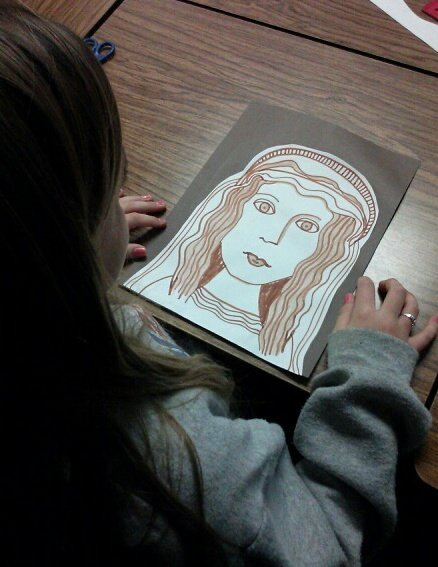
The Leonardo da Vinci unit follows the same three steps as every Meet the Masters artist, and ends with each child holding a Renaissance-style portrait drawn and painted with nothing more than a brown marker, a cotton swab and water.
Step 1: Introducing the Masters (assembly, 20–45 minutes)
A scripted slide presentation turns Leonardo into a character kids remember. Students hear the story behind the Mona Lisa, then vote with raised hands on words that match her expression: quiet, gentle, secretive. Next comes a surprise: Leonardo’s Five Grotesque Heads, a page of wild, funny faces that kids love to imitate.
Older students go further. They see the pages of his sketchbooks, try to read his famous backwards “mirror writing,” watch a short video of his flying machine designs brought to life, and learn about The Last Supper and the Renaissance. The assembly ends with a game where kids build a “talent list” of everything Leonardo could do: painter, musician, inventor, scientist and more.
Step 2: Learning from the Masters (worksheets, 15–30 minutes)
Back in the classroom, students complete a short practice packet at their level. Kindergartners practice drawing a Renaissance hat step by step. Older students learn one of Leonardo’s secrets of realism: dividing a face into halves to find exactly where the eyes, nose and mouth belong.
Step 3: Working with the Masters (art project, 50–60 minutes)
This is where kids create their own “Da Vinci’s Realism” portrait. The leader demonstrates each step at the board while students follow along:
- Draw a Renaissance hat with a floppy crown and a patterned hatband (zigzags, cross-hatching, diamonds).
- Outline long hair and a beard, the style of men in Leonardo’s time.
- Place the facial features using finger measurements, the same proportion trick from the worksheet.
- Add texture with dozens of short lines for the mustache, beard and flowing hair.
- Turn marker into paint. Students dip a cotton swab in water and trace their lines. The marker “magically” becomes paint, creating soft shading.
- “Bubble cut” and mount the portrait on brown paper, then glue an artist profile slip on the back.
Kindergartners do a shorter version that focuses on the Renaissance hat. Every level ends with a gallery moment: students stand, hold up their work and notice that each portrait looks different, just like Leonardo’s.
What kids get out of the Da Vinci lesson
One lesson gives children art history, real drawing skills and a finished piece they’re proud to take home.
- Close observation. Leonardo studied faces slowly and carefully. Kids practice the same habit of looking before drawing.
- Proportion and measurement. Dividing a face into halves and measuring with fingers quietly builds math and spatial reasoning.
- Line, texture and shading. Short strokes create hair texture; water turns marker lines into soft painted shading.
- Art vocabulary. Students learn and use words like portrait, self-portrait, realistic, detail, sketch, shading, fresco and Renaissance.
- History and science connections. Leonardo’s inventions, flying machines and anatomy studies link art to science, history and STEM.
- Curiosity and creativity. Leonardo’s notebooks show kids that wondering about everything is a strength.
- Confidence. Every child succeeds. Because each portrait turns out different, there’s no “wrong” answer, only their own version.
- A conversation starter at home. The artist profile slip on the back helps kids explain what they learned to their families.

How easy is it to teach?
Very. Every Meet the Masters lesson is scripted, timed and organized so a first-time volunteer can lead it with confidence.
- Word-for-word scripts. The assembly script tells you what to say, which slide to show and the answers to listen for. Kids are prompted to respond in unison, so the room stays engaged.
- Timed lesson plans. The “Working With” pages list minutes next to every step (5 for setup, 5 for the hat, 15 for detailing, and so on) to fit a 50–60 minute class.
- Demonstrate, then follow. The leader draws each step on the board and kids copy it. Child-friendly cues like “shape it like a hotdog or banana” and “measure four fingers” make instructions easy to give.
- Simple, low-mess supplies. A brown marker, double-ended cotton swabs, a cup of water, white and brown construction paper, scissors and glue. No paint palettes or brushes to wash.
- Built-in classroom management. Scripts name how many student helpers hand out supplies and how many help with cleanup.
- Training videos. MTM staff demonstrate each project step by step for every grade level, so you can watch before you teach.
- Four levels, one plan. Kindergarten, Beginning, Intermediate and Advanced versions let the same unit work from K through middle school.
The whole Da Vinci unit takes roughly two hours of class time across three sessions. See how the program works.
Why art matters in elementary school
The research is clear: art in the early grades helps children grow socially, emotionally and academically, and elementary students benefit the most.
- Better behavior and engagement. In a randomized study of 10,548 Houston students across 42 schools, more arts education cut disciplinary infractions by 3.6 percentage points. Elementary students also showed significantly higher school engagement. (Bowen & Kisida, 2019)
- Stronger writing. The same study found gains in standardized writing scores.
- Empathy and compassion. Students who received more arts learning showed more compassion for others, with the strongest effects among elementary students, English learners and gifted students.
- Higher aspirations. Elementary students in the Houston study reported greater interest in going to college.
- Academic recognition. Students involved in the arts are four times more likely to be recognized for academic achievement, according to research cited by Americans for the Arts. (That finding is a correlation, not proof of cause.)
- Fine motor skills. Drawing precise lines, controlling a cotton swab and cutting carefully build the hand control young children need for writing.
- Visual literacy. Kids learn to look closely, describe what they see and ask questions, skills that carry into reading, science and everyday life.
Lessons built around master artists add something more: a story. Children remember Leonardo’s backwards writing and flying machines long after the lesson, and that memory hooks them into history, science and culture.
Frequently asked questions
Do I need art experience to teach Meet the Masters? No. Lessons are fully scripted with step-by-step demonstrations, and training videos show every project before you teach it.
Can parent volunteers teach Meet the Masters? Yes. Many schools run the program with parent volunteers, and the materials were designed with them in mind.
How long does the Leonardo da Vinci lesson take? About two hours across three parts: a 20–45 minute assembly, a 15–30 minute worksheet session and a 50–60 minute art project.
What supplies does the Da Vinci project need? A brown marker, double-ended cotton swabs, water, white and brown construction paper, scissors and glue.
What grades is it for? Kindergarten through 8th grade, with four levels: Kindergarten, Beginning (grades 1–2), Intermediate (grades 3–4) and Advanced (grades 5–8).
Bring the masters to your students
You don’t have to be Leonardo to teach Leonardo. With Meet the Masters, any teacher, volunteer or parent can give children a real art education, one master artist at a time.
Explore 35 iconic artists or get pricing for your school.
